Pocket Quilt Tutorial
Make Do Pocket Quilt Score
Make a quilt out of pockets salvaged from old clothes.

1) Gather and prepare your pockets for sewing
Any pockets will do. In order to avoid sewing through bulky seams cut pockets out of the clothing with at least a 1/2 inch clear of the pocket seams for seam allowance. There can be more fabric around the pockets but no less than 1/2 an inch. Trim away any unnecessary bulk on the underside of the pocket, such as extra interfacing, linings etc. If you want the pockets to function, i.e. hold stuff, then leave in place the basic pocket lining gleaned from suits. Many pockets are stitched on top of the garment such as jean pockets or shirt pockets, so this is not an issue.
2) Choose a filler fabric
Choose any fabric or grouping of fabrics to use as filler, or sashing between your pockets as needed. Choose a fabric similar in weight to your pockets. If your pockets vary in weight choose a fabric that splits the difference between the heaviest and lightest weight fabrics if possible. There is no set amount. If you use it all up then make do with another filler fabric.
Watch the video on ruler free straight seaming above for guidance on steps 3-6.
3) Cut pockets to match using filler
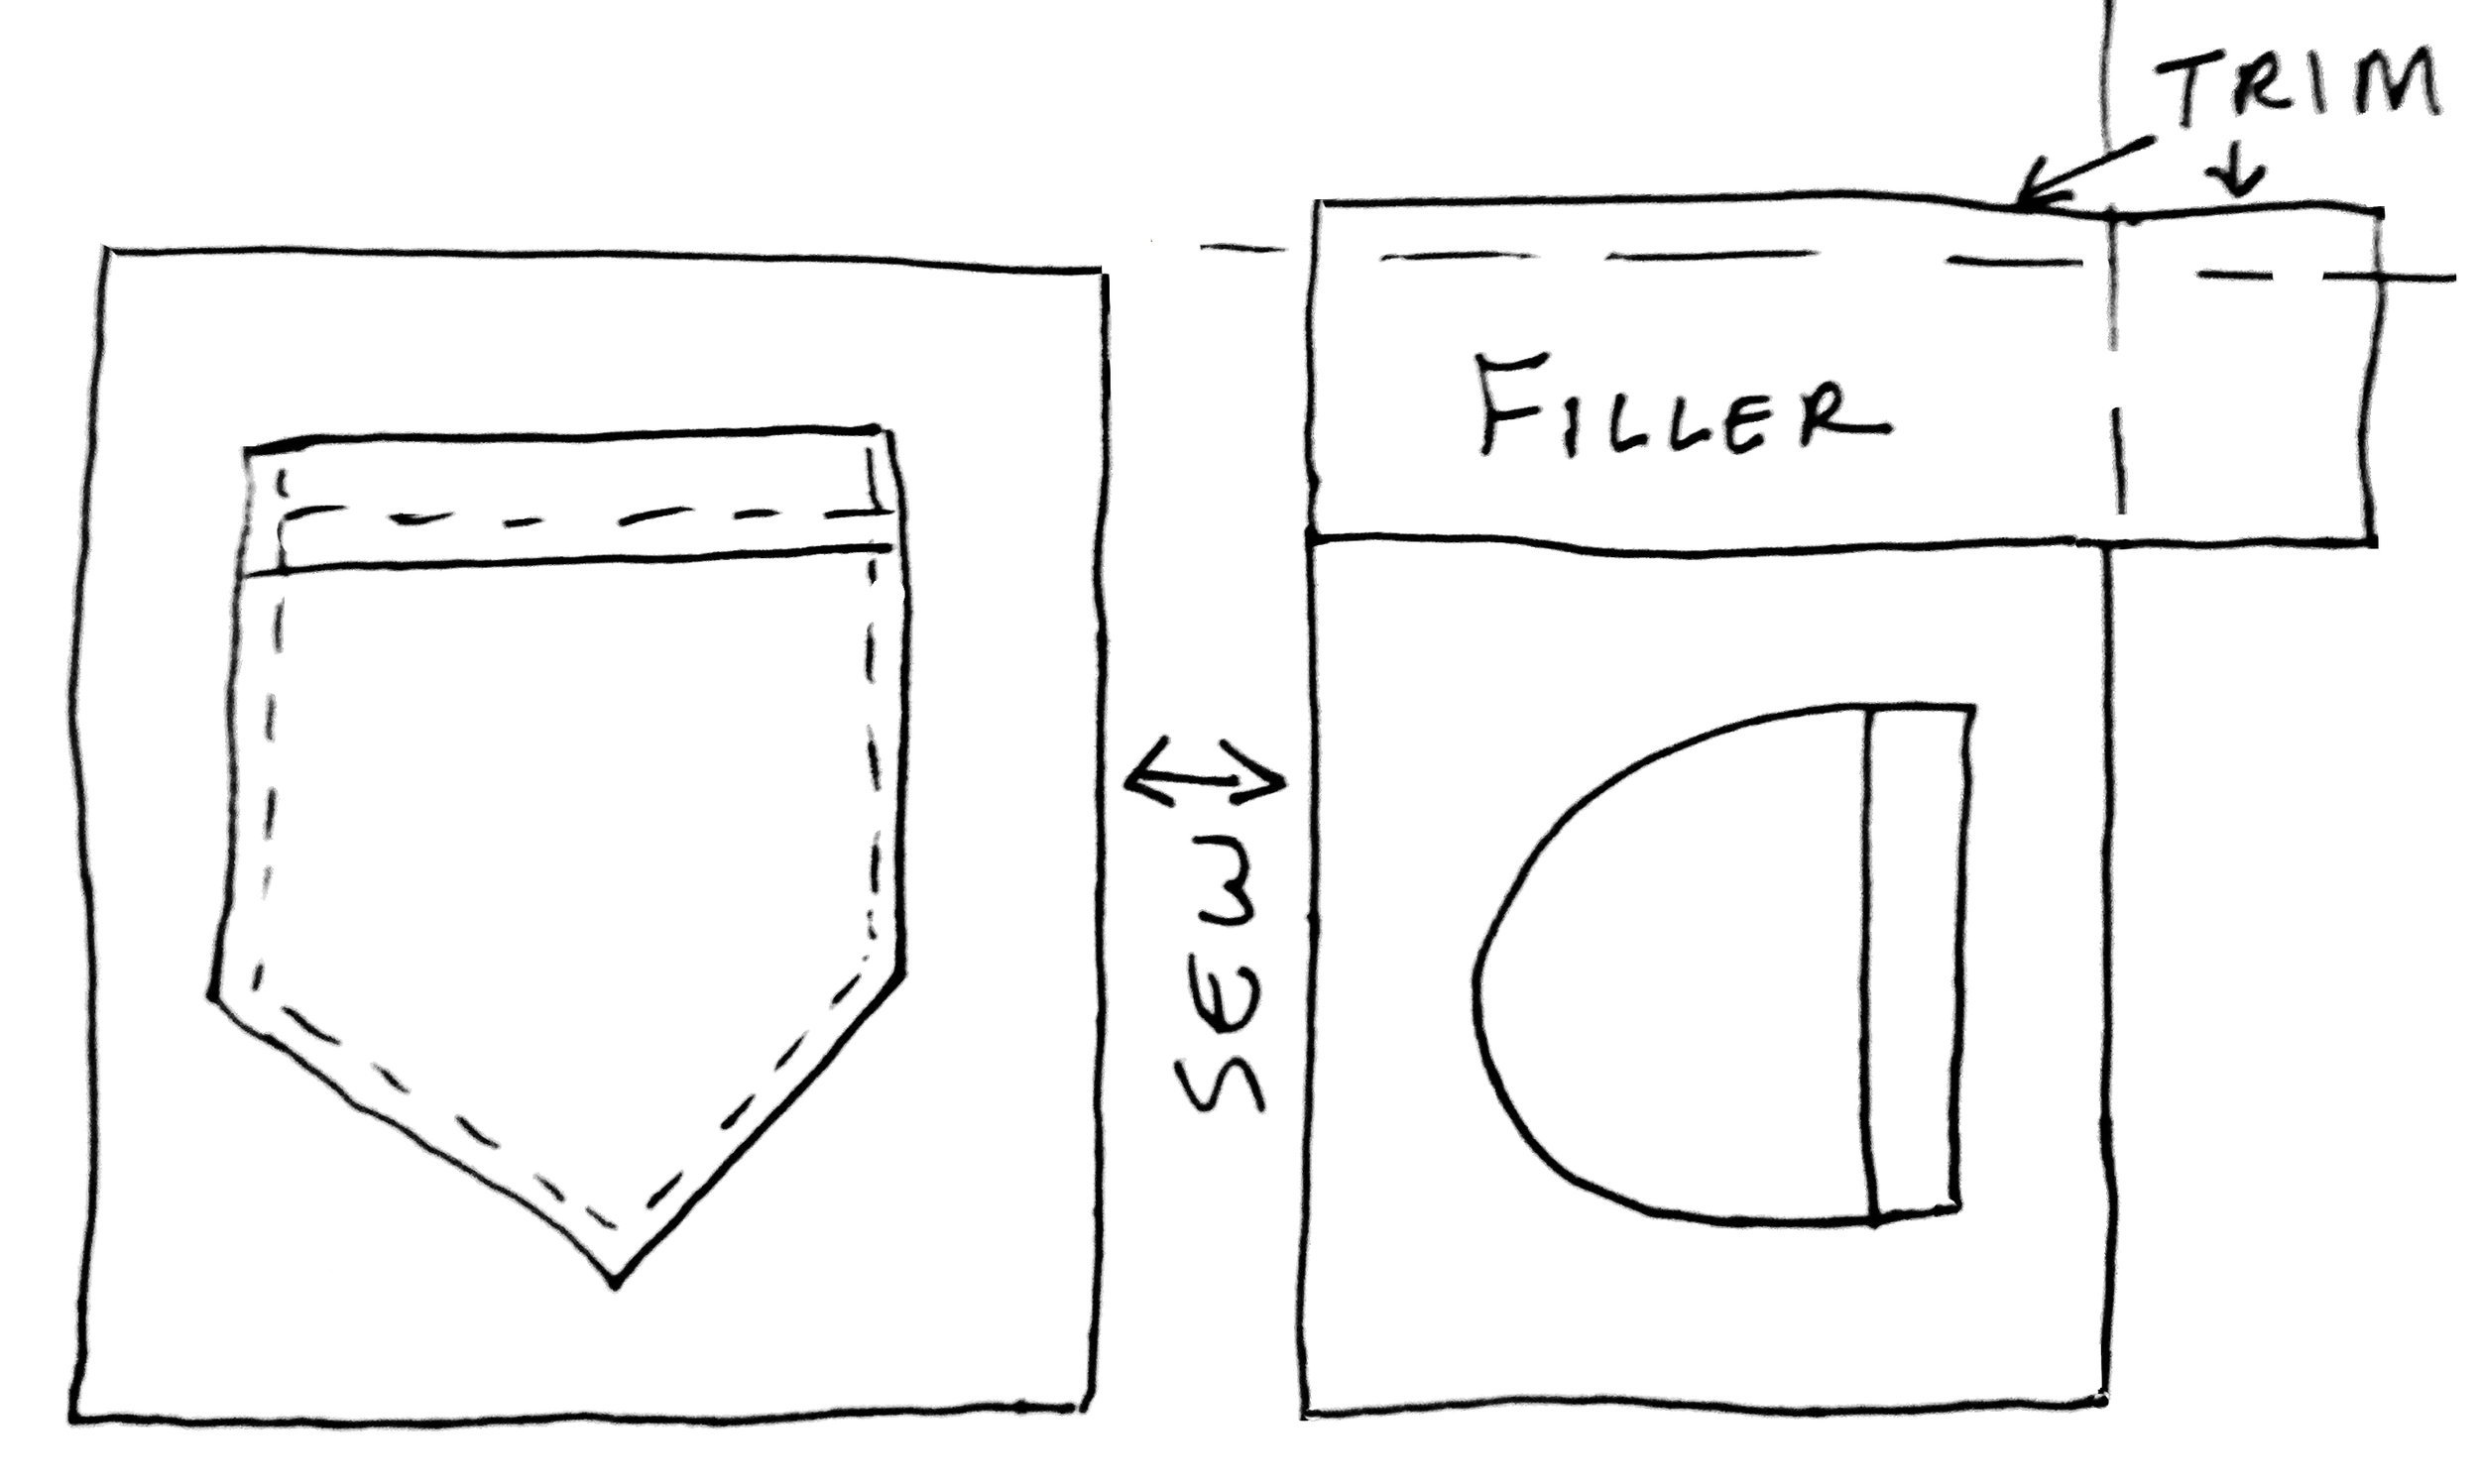
When you choose to attach two pockets together that are unequal in size, add filler fabric to the smaller pocket so that the seam edges of the two pockets are equal in length or the edge with the filler fabric is larger. After adding the filler place the two pockets TOP sides UP with any excess filler hanging past the larger pocket and butting the seam edges next to each other. Allow the seam edges to overlap where they don’t fit naturally, and cut to match like two pieces of a puzzle. It's okay if there is a slight curve to the cut as long as the sides being joined butt up next to each other without any gaps. Excess filler will be trimmed away once the two sides are sewn together. The goal of adding the filler is to preserve the pockets so that they do not have to be trimmed off when matching seam lengths.
4) Flip and sew
Once the seam edges of the pockets are of equal length and cut to match, flip the pockets TOP sides TOGETHER and sew a 1/4 inch seam. Press seams in any direction that allows for the flattest, least bulky outcome. Trim away any excess filler.
5) Use filler to sash the pockets
If you are joining two very bulky pockets consider using the filling as sashing, i.e. a border strip, between the two bulky pockets to join them. The sashing can be cut to any width that is pleasing to you. Be sure that the seam edges of both pockets and the sashing are equal in length before sewing. Sew the sashing to one pocket TOP sides TOGETHER and then sew the second pocket to the other side of the sashing, again TOP sides TOGETHER. Press.
6) Continue to build your pocket quilt in units
Continue to build your pocket quilt in this way, incorporating filler and sashing as needed, with bigger and bigger units until it reaches your intended size or you run out of pockets. As the units become larger, and seams longer, layer the seam edges TOP sides UP with one edge overlapping the other and mark with a piece of chalk. Cut the second seam edge along the chalk line to match. Butt seam edges together and mark across (perpendicular to) both edges. Flip TOP sides TOGETHER, pinning at the chalk markings to keep seam edges in line as you sew.
7) Finish your quilt
Once the pocket patchwork is complete, cut and/or piece a backing that is 4 inches larger on all sides and place BACK side UP with TOP side DOWN to the floor or on a flat surface. Layer the batting on top of the backing, an old mattress pad, blanket or comforter will do. Layer the pocket patchwork TOP side UP over the batting. Use wool or cotton thread to tie all the layers together. With a large sharp needle pierce all layers from top to bottom and back up again with the thread, spacing ties evenly every 4 to 6 inches. Cut threads with two inch tails on both ends, tie into a square knot. If you want to keep the pockets functional insert the ties around the pockets and not through them. Double fold the backing over the front to bind and topstitch the edge down. Wash and dry your quilt to secure the ties. Do an online search for tutorials on tying and binding a quilt for more detailed instruction on how to finish your pocket quilt.
Purchase a copy of my book The Improv Handbook For Modern Quilters for more information on ruler-free patchwork and quilt finishing techniques.